Friday, September 18, 2015

Blueberry-Almond Coffee Cake Recipe

This coffee cake is a sure way of perking up your morning. 
Soft and moist. With a nutty almond flavor and bursting with sweet, fresh blueberries.
Who wouldn't love to wake up to a slice of this irresistible cake, next to a hot and steamy cappuccino?
I could really eat a slice of this blueberry and almond coffee cake. Every. Single. Morning.
I absolutely love almonds and almond flavored desserts. And when you combine it with sweet and juicy blueberries, you will end up with a deliciously soft, mouth-watering dessert.
Just the thought of this coffee cake in the morning would make jump right out of bed and run for the espresso machine! No more laying lazily under my blankie!
Maybe eating this everyday would not be good for my waistline. But once in a while, why not? Check out the ingredients, it's made from scratch with simple and wholesome ingredients.


You will be surprise by how easy and quick it is to make. Just plan ahead, and remember to remove the butter and the eggs from the refrigerator about 30 minutes before starting with the recipe.
Room temperature ingredients are easier to mix into the batter, so you'll end up with a more uniform, tender, light and airy texture.

Here is the video for you:
Ingredients: to make a 9x9 in (22x22 cm) cake, cut in about 16 pieces   PRINTABLE RECIPE
  • 2 eggs, at room temperature
  • 1 cup (200 gr) of sugar
  • 4 oz (1 stick, 115 gr) unsalted butter, at room temperature
  • 1 teaspoon vanilla extract
  • 1/2 teaspoon almond extract
  • 1.5 cup (225 gr) of all-purpose flour
  • 1 pinch of salt
  • 1 teaspoon of baking powder
  • 2 cups (300 gr) of fresh (organic) blueberries
  • 1 cup (120 gr) of sliced almond, divided
Preparation time: about one hour and a half
Directions:
1. Let the eggs and butter sit outside the refrigerator for about 30 minutes.
2. Preheat the oven to 350° F (175° C). In a large bowl, add two eggs and the cup of sugar. Beat until smooth and fluffy.

3. Add the butter cut in pieces and mix again, until mostly smooth.

4. Mix in the vanilla and the almond extracts.

5. Add the flour, the salt and the baking powder. Blend some more.

6. Fold the blueberries and about 2/3 cup of the almonds. The remaining almonds will be sprinkled on top.

7. Spray or grease a 9x9 inches baking pan with butter and flour. Pour the batter in the pan and flatten it out with the back of a spoon.  Sprinkle the remaining almonds on top of the cake.

8. Bake for about 45-50 minutes at  350° F (175° C) until slightly golden on top. Test with a toothpick for readiness. The toothpick should come out clean ... unless of course you poke a blueberry :)
Let the cake cool down for a few minutes before cutting in squares.
Enjoy :)


Saturday, September 12, 2015

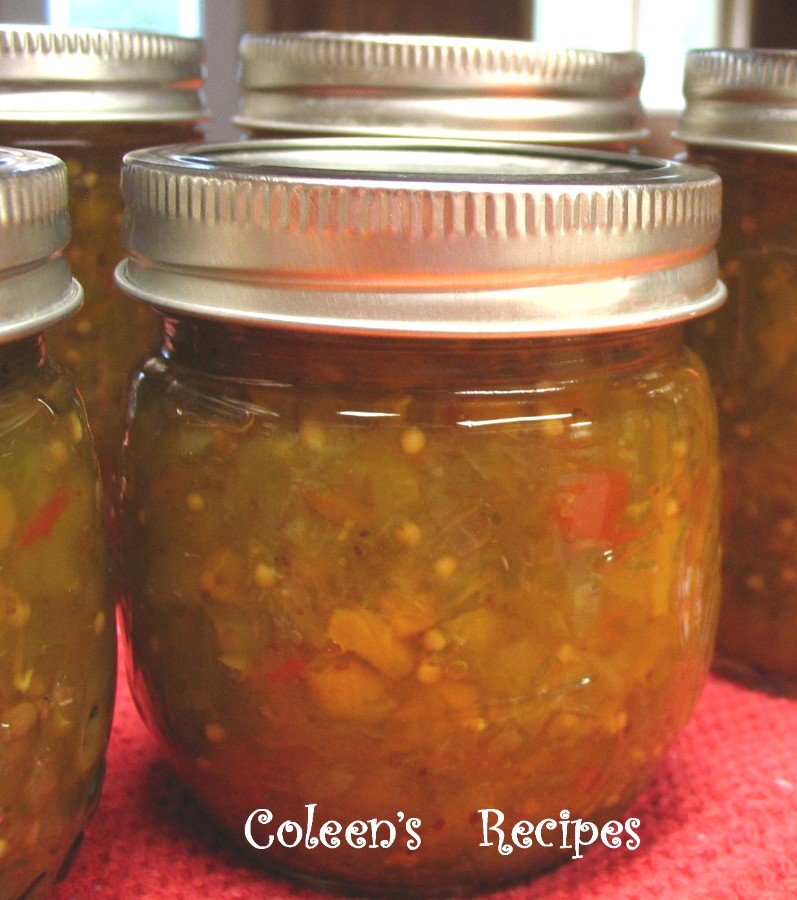
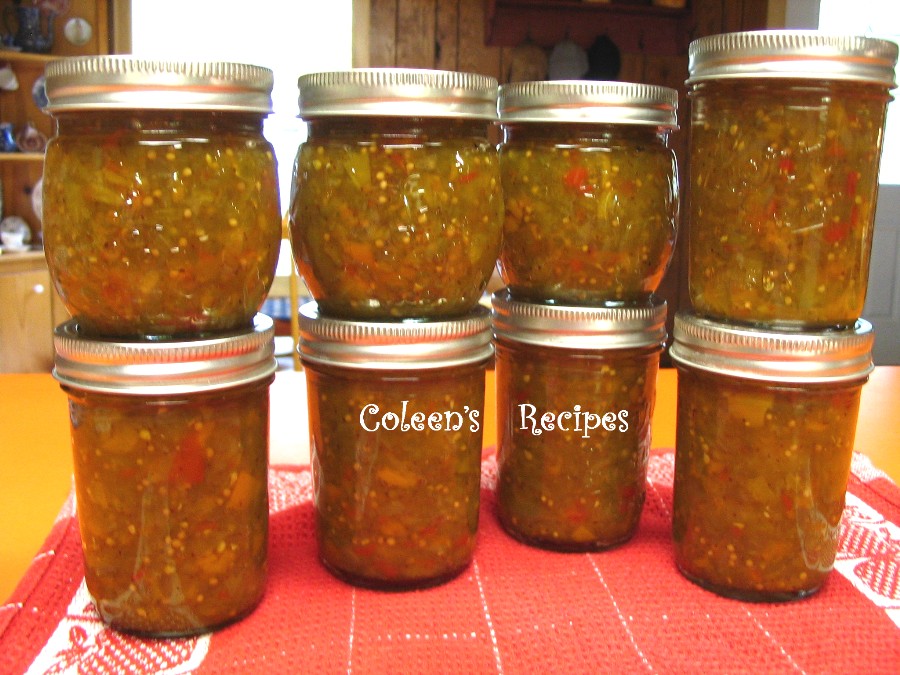
GREEN TOMATO PICKLE RELISH

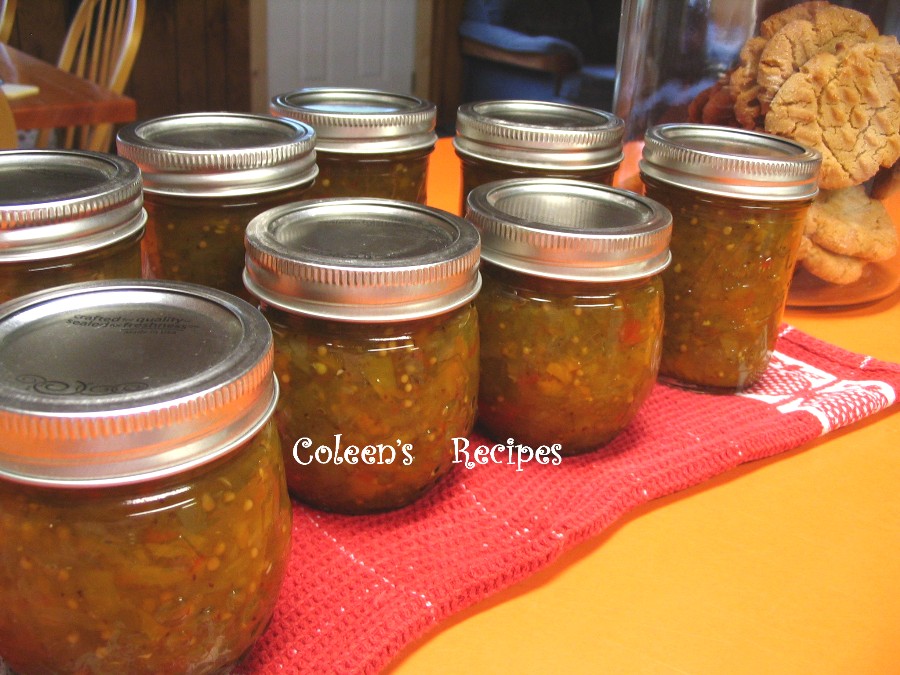
A wonderful gardener recently gave me a huge pan of green tomatoes and I instantly knew I wanted to make this relish. The recipe calls for simple pantry ingredients and it makes 9 cups of yummy relish, a wonderful addition to my pantry, thank you Bonnie!!

 
10 large, or 20 small GREEN tomatoes
4 red or orange bell peppers
1 large sweet onion
1 tablespoon + 2 teaspoons yellow mustard seed
1 tablespoon celery seed
2 cups apple cider vinegar
2 cups granulated sugar
1 tablespoon + 2 teaspoons kosher salt

TO PREPARE VEGETABLES:

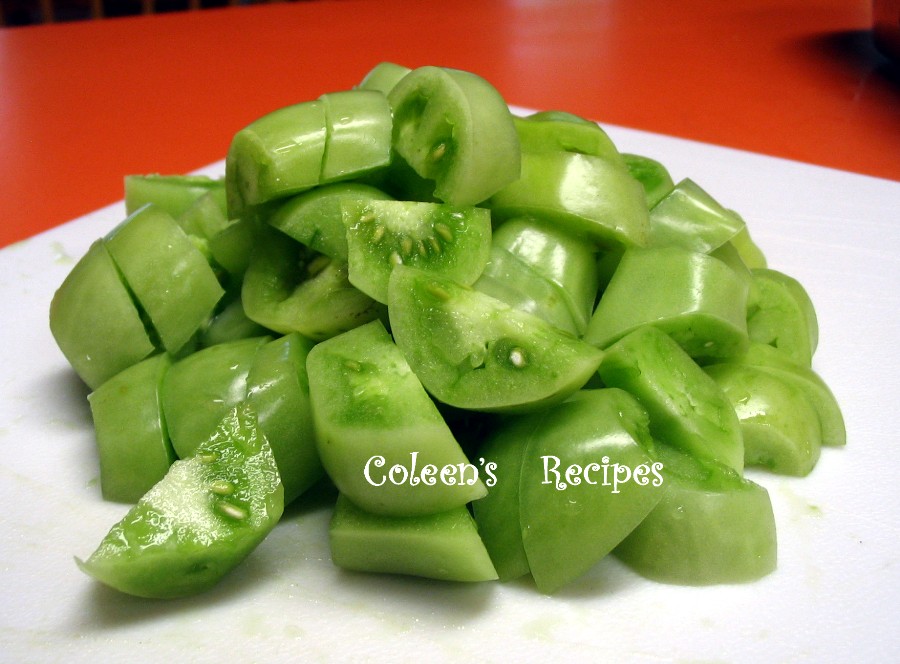
Core the green tomatoes and cut into medium size chunks, about this big:

 
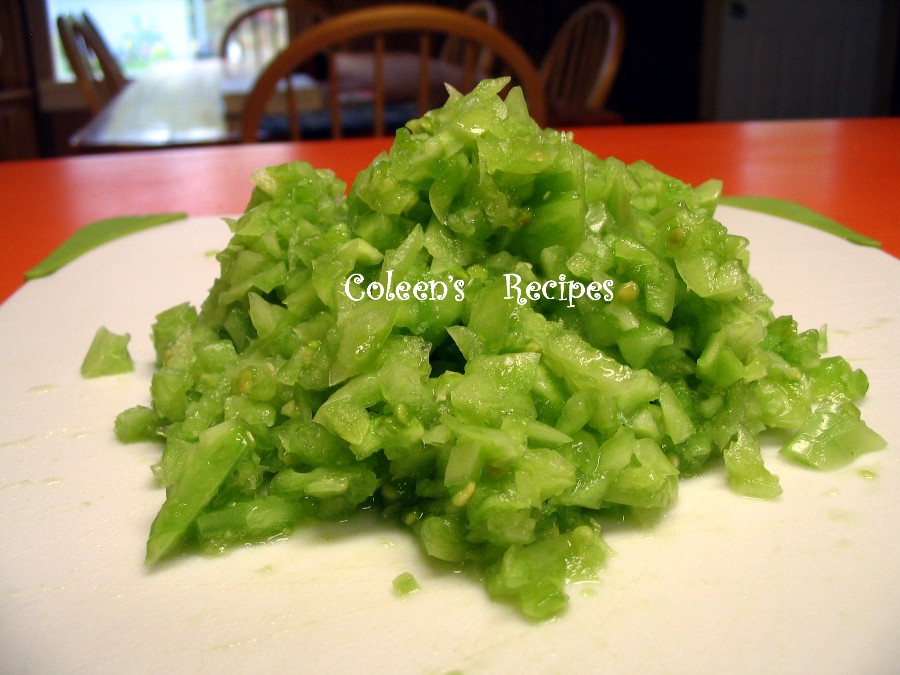
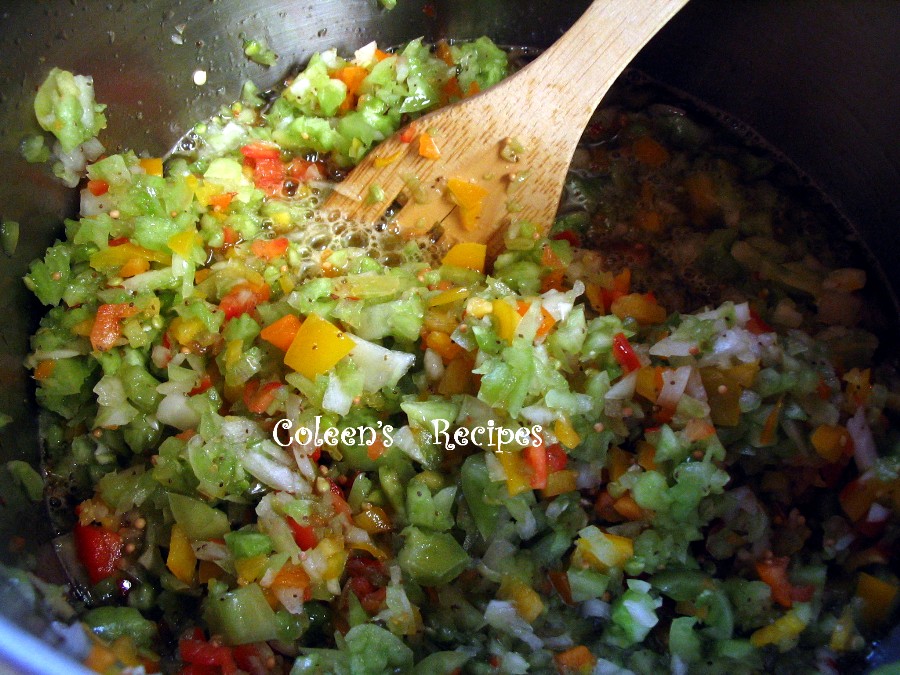
Put them in a food processor, in small batches, and pulse until they are about this size (don't over-pulse):


Do the same with the onion and bell peppers.

Put EVERYTHING into a large, non-reactive stock pot that has a heavy bottom (I use the bottom part of my pressure cooker) and gently toss together.


Bring the mixture to a boil and then turn the heat down to a slow simmer (see note below). 

Simmer UNCOVERED for two hours. I know that sounds like a LONG time, and the first time I tried this recipe, I was convinced that the veggies would cook away to nothing, but they don't.......trust me. Just gently stir about every 15 minutes. The vegetables will cook down and thicken into a wonderful relish.

Put relish into sterilized jars and process in a hot water bath (15 minutes for half pints and pints).


TIPS:

Original recipe called for half green bell peppers and half red bell peppers, but we don't care for the taste of green ones, so I modified the recipe and use all red and orange bell peppers.

Don't overload your food processor when you chop the vegetables. If you only load it with 2 or 3 cups at a time, you will get a nice fine chop without it turning to mush.

Recipe says to "slow simmer for 2 hours"......so, what is a slow simmer? My electric burner dial goes from 1 to 10, and a slow simmer on my stove is a 2.  Basically, you want it to simmer at the same heat you would use when you make rice....slow and steady.

Recipe calls for Kosher salt, I have never tried this recipe with table salt.


 ENJOY !!!


Friday, September 11, 2015

Rice Salad Recipe

Healthy, fresh and easy to make. This rice salad is just what you need for these hot summer days

It's so hot today, I cannot believe it! I went for my run this morning and thought I was going to melt on my way back. Really!! The forecast says we'll have a high of  95 degrees for today and tomorrow (that's about 35 degree Celsius). And for those of you who don't know me, I'm in Southern California near the ocean, with an average temperature of about 70 degree all year long. Breezy and cool, and not extremely hot.
With this unexpected heat wave, I don't feel like baking or cooking very much. So here is one of my favorite dishes for these occasions. It's fresh, wholesome, light and easy to make.
This dish can be prepared a day before and can be stored in the refrigerator for a couple of days. It's  perfect for a picnic or a barbecue. For a light dinner or to take along with you at work or school for a healthy lunch.

You can really make rice salad with many different ingredients. That's what I like about it so much. Change it up every time and make it fun. Today, I've prepared it with mixed pickled veggies, marinated artichoke hearts, olives, fresh mozzarella and hard boiled eggs. And of course, you need a drizzle of tasty olive oil and a sprinkle of chopped fresh basil. Sounds perfect, right?

Here is the video recipe for you.


Note, the quantities of the ingredients added to the rice are just to give  you an idea of what I did. But feel free to add or change anything as you prefer!

Ingredients: serving about 4
  • 1 1/2 cups (300 gr) rice ( I used long grain)
  • 3 hard boiled eggs
  • 1 cup (180  gr) of giardiniera - mixed pickled veggies
  • 1/2 cup (75 gr) of marinated artichokes hearts
  • 1/4 cup (35 gr) of mixed pitted olives ( I used Greek)
  • 6 oz (170 gr) of fresh mozzarella
  • a couple of tablespoons of extra virgin olive oil
  • salt
  • 3-4 leaves of fresh basil 
Preparation time: 30 minutes
Directions:

1. Bring a large pot of salted water to a boil. Simmer the rice, as directed. it should take about 15 minutes.
2. In a separate small pan, hard boil three eggs: place the eggs in the pan, cover with cold water. Bring the water to a boil over medium heat. When the water starts to boil, lower the flame to the minimum and let cook for about 8 to 10 minutes. Drain, run under cold water and peel.

3. In a large bowl, add the mixed pickled veggies, the artichoke hearts and the olives. All cut in small pieces.

4. When the rice is ready, drain and run quickly under cold water to cool it down. Drain well and add to the bowl with veggies.

5. Drizzle with a couple of tablespoons of extra virgin olive oil.

6. Cut in pieces the boiled egg and salt to taste.

7. Add the eggs, mozzarella cut in small cubes, and the basil cut in smaller pieces to the rice.
Mix well. And adjust with olive oil if necessary.

Serve at room temperature or store in the refrigerator up to two days.
Buon appetito! 


Friday, September 4, 2015

Rustic Nectarine Crosata Recipe

Homemade rustic crostata with sweet and juicy nectarines, a touch of cinnamon, over a buttery and flaky crust. 
Perfect dessert for the summer!
Have you ever eaten at GJelina? It's a popular restaurant on Abbot Kinney in Venice, California. So popular that it's always quite hard to make reservations. Even a month ahead! I know, this is L.A. ... what would I expect, right?!?
Anyways, I went there last week with my husband for our special anniversary lunch. And we got lucky. No reservation, and there was a table for two available right away. Woo hoo!
After eating there, now I know what all the fuss is about. Lunch was truly amazing! The menu is fun and interesting. Not really expensive. All the dishes were phenomenal, from start to finish. And without the kids at the table I could really focus on my food. Mmmm... I really want to go back. Soon!

Now it's a week after, and I'm still thinking about that lunch. Especially our dessert. We had a nectarine crostata with olive oil ice-cream. And as you can see from my pictures, I had to try and make it myself right away. 
I searched on line and found a great recipe on Bon Appetit Magazine for a  rustic fruit crostata. As usual, I made modification to the recipe. You know me: I can't help it :)
The result: NOT exactly like the crostata from GJelina. Probably it's impossible to re-create it without getting the secret ingredients from the chef. But mine, we all agreed, came out excellent nonetheless.
This rustic crostata is super easy to make. Much easier than baking a pie. And it tastes just as good, with a flaky and buttery crust, and a juicy and fruity filling. And let's not forget the delicious aroma of cinnamon.
I made the dough by hands, which takes a little longer than using a food processor. The dough needs to be chilled in the refrigerator for an hour or longer. Once chilled, you can roll the dough, pour the filling, fold the edges up, and stick it in the oven. It's rustic, and it needs to look homemade. So anybody can do it and it doesn't have to look perfect.
You will need to wait a few minutes for the tart to cool down a bit, before cutting yourself a big slice. And if you are anything like me, you will eat it warm with a big scoop of vanilla ice-cream on the side!!
As usual, I'm not just going to tell you how to prepare this dessert, but I will show you in this short video. Enjoy :)


Ingredients: to make a 10 inch (25 cm) tart, serves about 8                       PRINTABLE RECIPE

For the crust:

  • 1 2/3 cups (250 gr) of all-purpose flour
  • 1/3 cup (50 gr) of corn meal
  • 3 tablespoons (45 gr) of sugar
  • 1/2 teaspoon of salt
  • grated zest of an orange (organic)
  • 1 1/2 sticks (6 oz, 170 gr) of unsalted butter, chilled
  • 5-6 tablespoons (75-85 ml ) of cold  water

For the filling:

  • 1/4 cup (50 gr) sugar
  • 1 tablespoon of cornstarch
  • 1/2 teaspoon cinnamon, plus a bit to sprinkle on top (optional)
  • 3 large nectarines (mine were about 1 3/4 lb = 850 gr) ripe
  • 2 tablespoons of milk, for glaze (or one beaten egg)
  • sugar crystals (optional) for decoration

Preparation time: 30 minutes, plus 1 hour inactive and 1 hour baking
Directions:
1. Combine the flour, the cornmeal, the sugar and the orange peel in a large bowl.

2. Add the butter, and using the tip of a knife, cut the butter and reduce it to small (pea-size) pieces or as small as you can. If you have a processor, the job is a lot faster. Pulse only for a few seconds. Do not over mix.


3. Add 4 tablespoons of water. Mix with a spoon until the dough comes together. Add one or two more tablespoons of water if necessary. I used about 6 tablespoons total (85 ml) but that can vary.

4. Move the mixture to a large piece of plastic wrap. Make it into a disc. Wrap it in plastic and chill in the refrigerator for at least one hour, or overnight if needed.

5. Roll out the dough on a lightly floured surface. Sprinkle the top with flour, and turn the dough often to make sure it doesn't stick to the counter. Roll to about a 14 inch (36 cm) circle (diameter). Place it on a baking sheet covered with parchment paper, helping yourself with your rolling pin. Refrigerate again while you prepare the filling


6. Preheat the oven to 375º F (190º C). In a bowl mix the sugar with the cornstarch and the cinnamon. Add the nectarines cut in slices (about 16 slices each) and mix with a spoon.


7. Place the fruit in the middle of the dough and distribute evenly. Make sure to leave an edge around the border of about 2 inches (5 cm). The tart will come out to be about 10 inches in diameter. Brush the edge with milk.


8. Fold the edge over the fruit as shown in my picture. If the dough breaks at any point, don't worry! Pinch the dough to seal.

9. Brush the border (outer part now) with more milk. Sprinkle with sugar crystals and more cinnamon if you wish.

10. Bake at 375º F (190º C) for about 55-60 minutes, until golden on top. Let the crostata cool for at least 15 minutes before cutting. Serve at room temperature, or warm ... and how about  with a scoop of vanilla ice-cream?! Delicious!!