Showing posts with label CAKE RECIPES. Show all posts

Thursday, November 19, 2015

TROPICAL FRUITCAKE

There is just enough time to make these tropical fruitcakes for Christmas. They are sweet, rich and full of fruit (that you can identify) and nuts, then you wrap them tight and keep them cool for 4 weeks while the flavors blend together (and mellow out) and they becomes REAL fruitcake.  NO chunks of green candied mystery fruit in this recipe, just pineapple, coconut, apricot, pecans and banana. It is NOT the traditional boat anchor fruitcake.


1 cup butter room temperature
1 cup granulated sugar
3/4 cup brown sugar
1/4 cup apricot jam
1/2 cup mashed RIPE banana
2 teaspoons baking powder
1 teaspoon table salt
3/4 teaspoon coconut extract
5 eggs
3 3/4 cups all purpose flour
3 cups DRIED pineapple bits (16 ounces) (see note below)
3/4 cup rum (I use pineapple juice instead of rum)
2 cups sweetened coconut
1/2 cup coconut milk
2 cups pecan halves

The day before you bake, mix the rum (or pineapple juice) and the dried pineapple bits together and microwave (or heat) until bubbles start to appear around edge of bowl. Cover tight with plastic and let it sit, at room temperature, overnight.

Put the sweetened coconut on a dry baking sheet and toast in a preheated 300° oven for 10 to 15 minutes or until JUST light golden (watch it because it likes to burn).

On day of baking, cream room temperature butter, sugars, jam, mashed banana, baking powder, salt and extract until very smooth.


Beat in eggs, one at a time, beating well after each egg. The batter will look slightly curdled after this step, but that's OK.

Measure 3 3/4 cups of all purpose flour and set aside. Measure out 1/2 cup of coconut milk (find this in the ethnic food aisle)(shake the can really hard before you open it). Set it aside.

Add the flour, a little at a time, alternately with the coconut milk, beating on low until well mixed.

Stir in the toasted coconut and pecan halves.

Grease the loaf pans and fill half way up with batter. Decorate with maraschino cherry halves that have been patted dry (optional). 

Place pans on a bigger cookie sheet and bake in PREHEATED 300° oven: 1 hour for small loaf pans (7") and 90-95 minutes for full size loaf pans.

Finished fruitcakes should be golden brown and 200° in the center.

While fruitcakes are baking, make some vanilla simple sugar syrup by bringing 1 cup water + 1 cup granulated sugar + 1 teaspoon vanilla extract to a boil. Turn the temperature down to a very slow simmer and simmer for 3 minutes, then cool completely. When fruitcakes are still warm, baste the top of the cakes.

When fruitcakes are completely cool, wrap them tightly in plastic wrap and store in a COOL dark place for 4 weeks. Open them up once a week and brush with more vanilla simple sugar, then re-wrap.


MERRY CHRISTMAS!!
 
The dried pineapple bits are a little hard to find. Do NOT use fresh or canned pineapple because there's just too much water in them. Candied pineapple might work (I haven't tried it) but you would have to cut it up so that the pieces were about the size of a large pea.


Friday, October 16, 2015

PINEAPPLE--PUMPKIN--CARROT BARS

I have tried a LOT of snack cake recipes in the past 40+ years, but this one is, BY FAR, the best yet. It is super moist and tender from the crushed pineapple, pumpkin and grated carrots and it would be PERFECT for any potluck or party; your guests of all ages will love it. It is one of those RARE recipes that is super easy AND it gets RAVE reviews.


No need for an electric mixer, this quick and easy treat goes together in a flash with a big bowl and a spoon.

2 cups all purpose flour
1 teaspoon salt
1 teaspoon baking powder
1 teaspoon baking soda
1 teaspoon cinnamon
1 teaspoon pumpkin pie spice
4 eggs
1 2/3  cups white sugar
2/3  cup vegetable oil
1  (15 ounce) can pumpkin puree
2 cups shredded carrots  (see note below)
1  cup crushed pineapple (see note below)

Preheat oven to 350°F and grease and flour a 10x15 baking pan (see note below).

Mix the flour, salt, baking powder, baking soda, cinnamon and pumpkin pie spice in a bowl and set it aside.

In a large bowl, whisk the eggs till smooth, then add the sugar, oil and pumpkin, whisking it until its very well mixed, then stir in the drained crushed pineapple and grated carrots. Stir till well combined.

Stir in the flour mixture and gently fold until its all well mixed.
Pour into prepared 10 x 15 pan and bake at 350°F for 25-30 minutes (my electric oven took 30 minutes).

Remove from heat and cool before you frost.

CREAM CHEESE FROSTING
(1) 8 ounce pkg. cream cheese (room temperature)
6 tablespoons butter (room temperature)
1 teaspoon vanilla extract
2 1/2  cups powdered sugar

Beat the cream cheese and butter till smooth, add extract and powdered sugar and beat until right consistency.

NOTES:
This cake will turn out better if you hand grate the carrots with a box grater rather than grating them with your food processor. The food processor leaves very long strings of carrot, which doesn't do so well in a cake/bar.The box grater will give you a smaller/shorter grate.

Make sure the crushed pineapple is squeezed dry of all of it's extra water. I found that a 20 ounce can of crushed pineapple.....squeezed dry with my hands, gives me 1 cup of ready to use crushed pineapple which is just right for this recipe.

Not everyone has the 10 x 15 baking pan that is called for in this recipe. You can bake this cake in a 9 x 13 pan if you bake it a little longer (about 10-15 minutes longer... just test it with a toothpick to make sure its baked all the way through). The 9 x 13 pan will give you a thicker bar (almost like a cake) but it tastes the same. If you decide to use the 9x13 pan, the bars will be more like a cake


Personally, I like to line my baking pans with parchment paper and then spray the parchment paper with cooking spray. When the cake/bars are completely cool, you can just lift the whole thing out of the pan and it makes it much easier to cut up neatly.

ENJOY !!!

Friday, July 10, 2015

CLASSIC MOIST YELLOW CAKE

Everyone needs a GOOD yellow cake recipe and this one is delicious, super moist, super tender, and it freezes well.  There are so many uses for this versatile cake: bake it in a  9 x 13 for a potluck buffet; make it into a huge batch of cupcakes; make a DELICIOUS strawberry shortcake, plus many others.


CLASSIC MOIST YELLOW CAKE
4 large eggs at room temperature
2 egg yolks  at room temperature
1 1/4 cups buttermilk (divided) at room temperature
2 teaspoons vanilla extract
3 cups CAKE FLOUR  (spooned into cup and leveled off)
2 cups granulated sugar
1 tablespoon + 1/2 teaspoon baking powder
1/2 teaspoon salt
1 cup UNSALTED butter (room temperature)

Preheat oven to 350° and spray the bottom and sides of two 9" round cake pans with vegetable spray + line the bottom of each pan with parchment paper (or waxed paper in a pinch) and then spray the paper. Set aside.

Note: The order in which the ingredients go together seem a little backwards, but never fear, it works and produces a cake with wonderfully light texture and taste

In a small bowl whisk together the 4 whole eggs + 2 egg yolks and 1/4 cup of the buttermilk (you'll use the rest later) and add vanilla. Whisk until well mixed, set aside.

Sift the cake flour (cake flour tends to get little lumps in it) then whisk it together with the sugar, baking powder and salt. Using a electric mixer, add the room temperature butter and the remaining 1 cup of buttermilk. Mix on low until everything is well blended, then turn the speed up to medium and beat until the mixture is light and fluffy (2 minutes).

Add the egg-buttermilk mixture to the batter (adding one third at a time, making sure its well incorporated before adding more egg). Beat until you can't see the egg anymore, but don't over beat.

If you are making cupcakes, this recipe will make 24 large cupcakes.

 
If you are making a layer cake, pour batter into two 9" prepared pans and bake at 350° for 30-35 minutes or until a toothpick inserted in the center comes out clean.

single layer -- recipes makes two layers

Let the cakes cool in the pan for about 10 minutes, then (to loosen the sides of the cake) run a sharp but THIN knife blade around the inside edge of the pan. Turn cake out onto cooling rack and completely wrap HOT CAKE with plastic wrap. Cool completely before frosting.
 
ENJOY !!!

Wednesday, May 27, 2015

LEMON BLUEBERRY ZUCCHINI CAKE

This recipe is all over the Internet. So, when a friend asked me to make it for her family, I jumped right in. 

As written, I could see that the recipe might be a little heavy, so I made a couple very minor changes and it produced a wonderfully moist, tender and delicious cake.  I hope you'll try it, it's a breeze to make and our grandson labeled it "decadent"  (that's a good thing, I think? hahaha).


LEMON BLUEBERRY ZUCCHINI CAKE
2 cups finely shredded zucchini (squeezed dry)
1 pint fresh blueberries (I used about 2 cups)
3 eggs (I used room temperature eggs)
1 cup vegetable oil  (I use canola)
3 teaspoons vanilla extract
1 teaspoon lemon extract  (my addition)
2  1/4  cups white sugar
3 cups CAKE FLOUR  (recipe originally said AP flour)
1 teaspoon salt
1 teaspoon baking powder
1 teaspoon baking soda

Preheat oven to 350° and generously grease AND flour two 8" round cake pans (even if they are no stick).

Grate the zucchini (I used 2 small zucchini because they are very tender) and put then in a clean dish towel. Twist the towel closed around the zucchini and squeeze out the extra liquid (you will get quite a bit out), just keep twisting. Set aside.

Beat room temperature eggs, oil, vanilla extract, lemon extract and sugar together till well mixed. Fold in shredded zucchini by hand.

Sift the CAKE FLOUR (regular flour will work but it will give you a much heavier cake) into a large bowl, then gently dip in your measuring cup and level off the cup with a straight edge. Add 3 of these sifted cups of cake flour 1 cup at a time, mixing well in between each addition, but don't over mix.

Fold in the blueberries (save a few out for decoration).  Divide the batter in between the 2 prepared cake pans. Gently drop the pans on the counter to dislodge any possible air pockets.

Bake at 350° for 35-40 minutes. My electric oven took exactly 35 minutes. Test for doneness with the toothpick test.

Cool in cake pans for 20 minutes, then gently turn out of pan, onto a baking rack. Wrap the HOT cakes in plastic wrap and let cool completely.


When completely cool, unwrap the cakes and frost with lemon buttercream frosting and decorate with more blueberries.

Frosting
1 cup room temperature high quality butter (no substitutions)
3  1/2 cups powdered sugar
Juice of 1 lemon (2 tablespoons)
1 teaspoon lemon extract
1 teaspoon vanilla extract
1/8 teaspoon salt

Beat butter with electric mixer until smooth. Add everything else and beat on high till light and fluffy.


Monday, May 11, 2015

EASIEST NO-BAKE CAKE IN THE WORLD

The title, Easiest No-Bake Cake in the World, is not an exaggeration, that's for sure. It is also very impressive to serve, and EVERYONE wants the recipe. It's delicious, unique and SUPER EASY to make.


Before I give you the "recipe", let me just say that there really isn't a recipe. It's just homemade whipped cream, chocolate wafer cookies (chocolate graham crackers work too), and some decorations (nuts, candies, sprinkles, etc.). Then it sits in the fridge overnight. By the next day, the cookies (or graham crackers) will have softened, and they will taste just like cake !!

OK, here goes: The recipe calls for Nabisco chocolate wafer cookies, but some people have a hard time finding them (and they are expensive), that's why I'm suggesting CHOCOLATE graham crackers work equally as well (I think the chocolate graham crackers even taste better than these wafer cookies).

 
The recipe also calls for homemade whipping cream.  You can use Cool Whip if you have to, but it won't be as TASTY as homemade whipped cream:

3 cups heavy whipping cream
5 tablespoons sugar
2 teaspoons vanilla Extract

Beat these ingredients with an electric mixer (on high) until stiff peaks form, but don't over whip because it starts to taste like butter.

HINT: If you live in a hot climate, put your bowl and beaters in the freezer for 5 minutes (to cool them down) before making the whipped cream.

Now, it's time to assemble:  make 4 stacks of cookies (or chocolate graham crackers) 9 cookies high, putting some whipped cream in between each cookie, like this:


Next, lay the stacks on a serving plate next to each other (not end to end). They will want to smoosh around a little, but a very flat thin spatula will help you lift and maneuver each stack. It should look like this:

It's important to arrange them like this, so that when you serve this cake, you will be cutting ACROSS the cookies (the reason will be more obvious in the following photos.

Next cover the whole "cake" with a nice thick layer of whipped cream, like this:


Decorate (or don't decorate) the top of it with whatever you like: nuts, crushed candies, sprinkles, etc.

Cover lightly with plastic wrap and
chill overnight before you serve.
 
When it comes time to serve, cut the cake with a sharp, thin bladed, knife. It will slice through the softened cookies easily.
 
 
See why it's important to arrange the cookies cross wise, so when you cut it, you get this impressive design?
 
Store, covered, in the fridge and be prepared for recipe requests.
 
 
ENJOY !!!


Tuesday, May 5, 2015

HOT FUDGE SUNDAY CAKE FOR MOTHERS DAY

Click On This Photo For
The Full YUMMMMM-factor

 
The first time I saw this recipe, I knew I had to try it because it had a lot of things going for it. First and foremost, it is an ooey-gooey chocolate dream. Secondly, there are no mixing bowls (you mix it right in the baking pan). Thirdly, it does not require any special ingredients (not even butter or eggs). And finally, this super-tender chocolate cake bakes on top of a rich hot fudge sauce…need I say more?

¾ cup all-purpose flour
2/3 cup white sugar
½ cup unsweetened baking cocoa
(divided)1½ teaspoons baking powder
½ teaspoon salt
½ cup milk
3 tablespoons vegetable oil
2/3 cup brown sugar (packed)
1 teaspoon vanilla extract
1¼ cups boiling water
1½ teaspoons instant coffee granules
Vanilla ice cream


Preheat oven to 350°. In an (un-greased) 8”x8” baking pan, mix flour, white sugar, ¼ cup of the cocoa, baking powder and salt (stir it up to combine); add the milk and oil and stir until the batter is well mixed.

.
Mix the brown sugar and ¼ cup of cocoa together and sprinkle evenly over the batter (DO NOT MIX IT IN).
.
Combine the boiling water, vanilla and instant coffee and gently pour it over everything (DO NOT MIX IT IN).
.
Bake for 35 minutes (the hot fudge sauce will bubble up from underneath and around the edges of the cake as it bakes). Allow this to cool for 15 minutes before you serve it (just make sure it's very warm when you serve it).
.
To serve, top a slice of cake with scoop of vanilla ice cream and spoon the hot fudge sauce (from the bottom of the pan)over the ice cream.

.
As simple as this dessert is…it is just unique enough (and delicious enough) for company as well.

Wednesday, April 29, 2015

GRANNY's CREAM CHEESE POUND CAKE

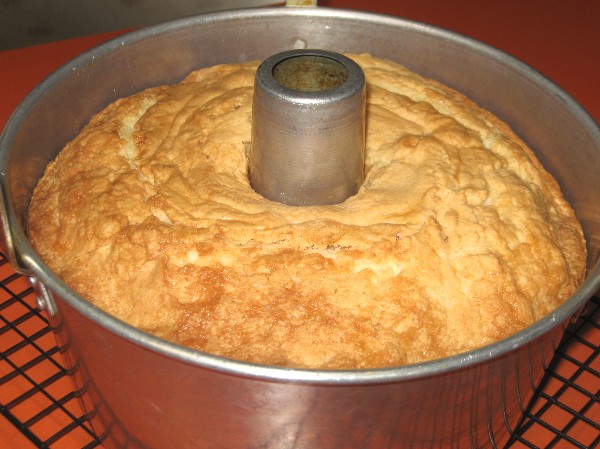
Don't let this unassuming photo deter you from this recipe. This is, by far, one of the best cakes we've ever had. It is everything you want in a pound cake... it is tender, it has a very fine crumb, it is sweet, rich and buttery. Whether you are slicing it up for the perfect strawberry shortcake or serving it with a big scoop of ice cream, this is the perfect cake ...even for the most picky guests!!
At our house, we seldom even frost this, we just snack on it till it's gone.......it is THAT good.


1 1/2 cups butter at room temperature (important)
8 ounces cream cheese at room temperature(important)
3 cups granulated sugar
6 large eggs at room temperature (important)
3 cups cake flour
1/8 teaspoon salt
2 teaspoons vanilla extract
1 teaspoon coconut extract

In a LARGE bowl, with electric mixer, beat the room temperature butter for about a minute.  Add the room temperature cream cheese and beat for two more minutes (it should look light and fluffy). It is very important that both of these ingredients are at room temperature.

Gradually sprinkle in the sugar (while your mixer is running) 1/2 cup at a time; beat well.  Add the eggs, one at a time, beating well after each egg. Mix in extracts.

Measure out 3 cups of CAKE FLOUR and 1/8 tsp. salt, then sift it all.  Add slowly to butter mixture, on low speed, mixing well after each addition.

Generously grease AND flour a 10" bundt pan (don't use cooking spray)   Bake in preheated 300 degree oven for 1 hour 40 minutes, or till toothpick tests clean.


Fairly nondescript looking, but don't let that sway you.  The genius of this recipe is in the taste. The combination of butter and cream cheese makes this cake to die for moist and rich.

Let the cake cool, in the pan, for 15 minutes before you turn it out, then cover it with plastic wrap, directly on the surface of the hot cake, until it is completely cool. Frost as desired.


NOTE:  Yes, 300 degree oven is correct.

NOTE: Don't be tempted to grease your pan with vegetable spray. Make sure you grease and flour your pan well (tap out excess flour).

NOTE: Make sure you sift the cake flour. I know it is a pain, but cake flour tends to clump more than all purpose flour, so this step is important. You CAN make this cake with all purpose flour, but you won't get that very fine crumb that is so delicious.

ENJOY !!!

Wednesday, March 4, 2015

EASY ANGEL FOOD CUPCAKES

Slight variations of this easy angel food cupcake recipe are all over the Internet, but look no further, todays post is DELICIOUS!!!

Even my picky-picky husband ate several of these this afternoon and he is NOT known to be big on snacking (so that is quite the thumbs up at our house).

The cupcake is super moist, ultra light and fluffy and definitely going (immediately) into my "make again soon" recipe box.


3/4 cup + 2 tablespoons caster sugar(divided)(see note below)
1/2 cup CAKE FLOUR  (no substitutions)
1/4 teaspoon salt
6 egg whites (at room temperature) (see note below)
2 1/2 tablespoons warm water (not hot)
1/2 teaspoon vanilla extract
1   tablespoon lemon juice

Preheat oven to 350° and put paper cupcake liners in your cupcake pan (makes 18).

Sift together 1/2 cup castor sugar (reserve the rest) + 1/2 cup cake flour + salt and set this mixture aside. (*Make sure you use only 1/2 cup of the castor sugar in this step)

With electric mixer and a large bowl (I use my stand mixer), beat the egg whites, warm water, vanilla, lemon juice and 1/4 cup of the reserved caster sugar. Beat until its very foamy, then while the mixer is still going, sprinkle in the reserved final two tablespoons of caster sugar and beat on high till stiff peaks form. If you are using a hand mixer, this can take as long as 5 minutes, but I had stiff peaks in only 2-3 minutes with my stand mixer.

After egg white mixture reaches stiff peaks, turn mixer off and use a spatula to GENTLY FOLD IN the cake flour mixture (about 1/3 of it at a time).

Divide the batter (it will look like meringue) evenly between 18 cupcake papers. Stack the batter high above the top of the cupcake papers.

Bake at 350° for 18 minutes or till top is light golden. Remove from oven and cool in the pan. When they are completely cool to the touch  when you hold your hand against the underside of the cupcake pan.....then you can frost or top with whipped cream and berries.


NOTE:  If you do not have caster sugar(which is fine sugar but NOT powdered sugar) you can make it by putting it in the food processor for about 15 seconds. Just make sure you measure it AFTER it comes out of the food processor.
 
NOTE: To get "room temperature eggs", I put mine in a bowl and then cover them with (almost) hot tap water and let them sit for 15 minutes.
 
NOTE: Make sure you stack the batter in a well rounded mound above the top of the cupcake paper. When you first take them out of the oven, they will look tall, but they collapse as they cool so that the final cupcake is even with the top of the cupcake paper.
 
 
ENJOY !!!

Friday, February 27, 2015

SARAH LEE POUND CAKE CLONE

I don't know how many times I've tried one of those clone recipes and later thought..."close, but no cigar".  But this time, I've hit the mother lode.

Not only is this cake made from standard pantry staples, but it is rich, buttery and it has a very fine and velvety crumb, just like a Sarah Lee pound cake. I can think of a million great uses for this quick and easy cake, but I doubt it will last that long around here. I'm definitely going to be putting one of these beauties in the freezer for unexpected guests.


8 ounces butter at room temperature (no substitutions)
2 cups powdered sugar
2 large eggs
3 tablespoons sour cream
1 2/3 cups CAKE FLOUR  (important, no substitutes)
2 teaspoons lemon extract
1 teaspoon vanilla extract

Recipe calls for an 8 1/2" loaf pan. If you are using Pyrex, preheat your oven to 325°. If you are using a metal pan, preheat the oven to 350°. Spray the pan with cooking spray, then line it with parchment paper (or foil) and spray again.

Cream the butter and powdered sugar with an electric mixer on high speed for a full FIVE MINUTES.

Add one of the eggs and a couple spoons of the flour and beat another TWO MINUTES.

Add the 2nd egg and half of the remaining flour  and beat another TWO MINUTES.

Add the sour cream and the rest of the flour and the extracts, and beat another TWO MINUTES.

Spread the batter into the greased parchment paper lined loaf pan and bake  65 minutes or until a toothpick tests clean.

Cool in the pan (on a rack) for 20 minutes before you take it out of the pan.  Wrap the HOT pound cake snugly in plastic wrap and cool completely.
 

NOTES: It is important to use cake flour. With all of the mixing in this recipe, all purpose flour or bread flour wouldn't give you a very good cake.

Friday, February 6, 2015

EASY MOIST POUND CAKE

This cake is not only easy to make, but it is super moist and flavorful. It is great just to snack on, or for shortcake or even petit fours. When its cooled, it cuts beautifully.

 
3/4 cup butter (room temperature)
6 ounces cream cheese (room temperature)
5 eggs (room temperature)
1 1/2  cups sugar
1 teaspoon baking powder
2 teaspoons vanilla extract
1 teaspoon coconut extract (see note)
3 tablespoons milk
1 3/4 cups + 2 tablespoons all purpose flour
 
Spray a 9" x 5" x 2 3/4" loaf pan with cooking spray and then line the bottom only with parchment paper (waxed paper will work in a pinch) then spray the paper too..
 
In large bowl, beat the butter, cream cheese, sugar, baking powder, milk and extracts until smooth.
 
Add the eggs, one at a time, beating well after each egg. When the eggs are all in there, beat batter on high for 3 minutes.
 
Sift the flour, then add it (while the mixer is running on LOW) 1/4 cup at a time, beating only until the flour is well incorporated, but don't over mix.
 
Bake in prepared pan in pre-heated 350° oven for 70 to 75 minutes or until a toothpick tests clean. My electric oven takes 70 minutes.
 
Let the cake cool in the pan for 15 minutes, then run a knife around the edges and tip it out onto a cooling rack.
 
While the cake is still VERY hot, wrap it tightly with plastic wrap and let it cool that way. This makes a huge difference in the moisture any cake will have. I do ALL of my cakes this way.
 
 
NOTE: The coconut extract gives this cake a wonderful flavor (you won't taste the coconut) but it really adds to the vanilla flavor. If you don't have coconut extract, use the required 2 teaspoons of vanilla and 1 more teaspoon of your favorite extract, like rum, or orange or almond.
 

Friday, January 24, 2014

FRESH PINEAPPLE UPSIDE-DOWN CAKE

I'm not sure WHY I've never thought of making a pineapple upside-down cake with FRESH pineapple before. Maybe it is because ALL of my cookbooks suggest canned pineapple? Maybe it is because canned pineapple is always in the pantry? Maybe it is because I'm not very adventurous? Well, this cake came about due to the rare combination of... "I want to bake something" + "what can I do with this very ripe pineapple?" + "the perfect window of time". 

The end result was this pineapple upside-down cake made with FRESH pineapple and it was delicious!! The difference is like night and day!!


Preheat your oven to 350 and cut a parchment paper liner for the bottom of a 9" round cake pan. Spray the pan and parchment paper with a light coating of cooking spray. The parchment paper is not absolutely necessary, but it helps if you have a "sticking" issue with the sweet pineapple glaze (you can use waxed paper in a pinch).

5 tablespoons of melted butter
2/3 cup brown sugar (packed)
3 cups fresh pineapple cut into 1" cubes (see note)
maraschino cherries cut in half
1 1/2 cups all purpose flour
1 1/2 teaspoons baking powder
1/2 teaspoon salt
1/2 teaspoon cinnamon
1/2 cup butter (room temperature)
2/3 cup white sugar
2 eggs
3/4 cup pineapple juice (or milk)
1 teaspoon vanilla
1 teaspoon butter extract
1/2 cup pecans chopped medium-small

Mix melted butter with brown sugar and spread evenly in prepared 9" round cake pan. Set aside.

Cut pineapple into 1" chunks and blot them dry between several thicknesses of paper towel (press on them a little to extract excess juice).

For the batter, cream the butter and sugar until it is really fluffy. Under-beating the butter at this stage will give you a poor quality cake. When it is nice and fluffy, add the eggs (one at a time) and extracts and beat until its fluffy again.

Sift the flour, baking powder and cinnamon into a bowl. Add the flour mixture to the butter mixture in three parts, alternately with the pineapple juice (or milk) starting and ending with the flour. Set aside.

Assembly: Nestle the pineapple, pecans and cherry pieces down into the brown sugar mixture in the cake pan (arrange in pretty fashion because this will show). Pour the cake batter over the top and very gently spread it out.

Bake in 350 oven for 45 to 55 minutes or until a toothpick tests clean (my oven takes exactly 45 minutes). Remove from oven and sit pan on a cooling rack for 15 minutes. After 15 minutes, run a thin bladed knife around the edge of the cake and invert onto a serving plate and peel off the parchment paper. Serve cake warm or at room temperature.

NOTE: Traditionally, pineapple upside-down cake has pretty rings of pineapple with red cherries in the center of each ring. However, when the cake is baked like that, it is hard to eat. You either get a big unmanageable hunk of pineapple on your piece of cake or no pineapple at all (does that make sense?). Instead, I cut the pineapple into very small pieces (almost a dice) and arrange the cherries randomly over the cake. It is much easier to cut, serve and eat (even if it ISN'T traditional). If you use this diced pineapple style, it only takes two cups of diced fruit instead of three.

Tuesday, January 21, 2014

APPLE SNACKING CAKE

This old fashioned, super moist, snack cake is quick, easy and only takes ONE apple!! It is the PERFECT snacking cake and goes wonderfully in a lunch box.


1/3 cup brown sugar lightly packed
1 teaspoon ground cinnamon
2/3 cup white sugar
1/2 cup butter (room temperature)
2 eggs
1  1/2 teaspoons vanilla extract
1  1/2 cups flour
1  3/4 teaspoons baking powder
1/2 cup milk
1 large apple
 
Preheat oven to 350°F and grease and flour a 9"x5" loaf pan.
 
Core and peel the apple then pulse it in the food processor a few times until the pieces are about the size of a green pea.
 
Mix brown sugar and cinnamon together and set aside. 
 
Beat white sugar and butter together until smooth and creamy; beat in eggs, one at a time; add vanilla, flour and baking powder and beat until smooth, then stir in the milk and chopped apples, until the batter is well mixed.
 
Place 1/3 of the batter in the loaf pan and top with 1/3 of the sugar-cinnamon mixture; do that two more times, ending with sugar cinnamon.
 
Bake at 350°F for 30-40 minutes (my electric oven takes 40 minutes) or until toothpick tests clean.
 
Let cake cool in pan for about 10 minutes, then turn it out on a rack to cool.
 
This snacking cake definitely does NOT need any frosting, ENJOY!!


Saturday, November 2, 2013

CHEESECAKE BROWNIE CUPCAKES

This recipe is a delightful combination of a brownie layer baked under a vanilla cheesecake layer; do I have your attention yet? 

They are delicious and seriously going onto my holiday dessert tray this year. If you like chocolate (duh!!) AND you like cheesecake (double duh!!) you will love these quick and simple treats.

 
Brownie Layer
1 ounce semi-sweet chocolate
1/4 cup butter
1 tablespoon cocoa powder
1/2 cup sugar
pinch salt
1 large egg
1 teaspoon vanilla
1/3 cup flour

Heat chocolate, cocoa and butter (I use my microwave) just until melted, then stir well and set aside to cool while you do the next step.

In another medium size bowl mix sugar, egg and vanilla till smooth; add melted chocolate/butter and flour and stir just until it looks well mixed (I do this by hand - no mixer); set aside.

Cheesecake Layer
8 ounce cream cheese (room temperature)
1/3 cup sugar
1 large egg
1 teaspoon vanilla

Using electric mixer, beat the cream cheese until it is very smooth. Add the sugar, egg and vanilla and continue mixing until creamy smooth.


Preheat oven to 350°. Line cupcake pan with 12 foil liners. If you don't have foil liners, you can use paper liners, but you will have to mist them with a little vegetable spray.

Put a very lightly rounded tablespoon of brownie batter in each cupcake foil and roughly spread it around a little.

Top the brownie layer with the cheesecake mixture, dividing it equally between the 12 cupcakes.
 
Bake for 30 minutes.  Remove from oven but do not remove from the cupcake pan. Let them sit at room temperature for 30 minutes, then chill in fridge (still in pan) for several hours.


I topped these little gems with a ganache (but you don't have to).  To make that, I just mixed a large handful of chocolate chips with 1/4 cup very hot (but not boiling) heavy cream, stirring until thick and smooth.

These are also very pretty at holiday time, topped with cherry pie filling and a swirl of whipped cream; it's sort of an individual black forest cake idea.


Wednesday, July 10, 2013

CAKE DECORATING 101

I don't profess to be a great cake decorator but I do "OK"; lets just say if I can do it, certainly YOU can do it; it isn't rocket science.

This post has a very good basic butter cream frosting recipe and a few tricks of the trade that I've learned over the years. Don't be nervous, just jump in and "give it a go". Practice makes perfect and your friends and family will love eating those "practice cakes" (our kids grew up on them).


BUTTER CREAM FROSTING

1 cup white Crisco vegetable shortening
1 cup butter (room temperature)
8 cups powdered sugar
1/4 teaspoon salt
3 teaspoons vanilla extract
1 teaspoon almond extract
2/3 cup heavy cream

With an electric mixer (stand mixer works best) beat the vegetable shortening and (room temperature) butter until it is well mixed together.

Add half of the powdered sugar, salt, extracts and half of the cream. Beat until very well mixed.

Add the last half of the powdered sugar and the last half of the cream.  Beat on high for 2 or 3 minutes until very fluffy (makes a lot of frosting).
 
 
NOTE: Some people freak out about shortening in the frosting and I understand that, but, remember.....when you buy a cake from a chain type bakery, the frosting is made with ALL shortening, trust me!!

If you are dead-set against using vegetable shortening, you CAN use all butter, but the taste is very heavy; it is your choice.

NOTE: This frosting is great for the entire cake including borders and piping words, etc., but it IS a soft frosting and it WILL melt if you have it out in the sun or in a very hot room.  I like to frost  my cakes and then chill them until about an hour before serving.

If you don't have time to freeze the cake, just make sure it is completely cooled before frosting it (not even just a LITTLE bit warm).

DECORATING TIPS

Cupcakes are very popular right now and they are super easy to do. Using the above frosting recipe and a Wilton M1 decorating tip, you can have cupcakes that look like they came from a bakery in no time; that big M1 tip is the secret.


The following mini-lesson, is for a simple "every day" one layer 9x13 cake.

1. Brush all the crumbs off of the cake (you will thank me later)because it is easy to get the crumbs mixed in with your frosting and that isn't pretty.

2. I like to wrap or cover my HOT cake with saran wrap (right on the surface of the cake) and then let it cool down and put the wrapped cake in the freezer overnight.  The day you want to serve the cake, take it out of the freezer and frost it while it's still frozen. A frozen cake is sturdy and the frosting stays right where you put it.
Don't put it back in the freezer!!  The frozen/frosted cake will thaw out in about 60-90 minutes and be perfect for serving.

3. Put a thick layer of frosting all over your cake; don't worry about it looking smooth at this point, just try to cover it evenly.


4. Now here is a little trick that I learned a million years ago. Get a small fine mist spray bottle (that isn't used for anything else) and fill it with cold water. Give the frosting a light mist (from the distance of about a foot(just a super quick fine spritz) then smooth the frosting with a smooth bladed knife(wiping off your knife in between each stroke).  I always use an off-set spatula for this (see photo below) but any non-serrated knife will work in a pinch.

If you don't have a spray bottle, you can almost get the same effect by dipping your spatula into very hot water (then shaking off all excess water) before smoothing your frosting. This next picture shows what just ONE SWIPE around the sides of this cake (using the warm wet knife method) will do; you can imagine if you went over it a couple more times.


 If you are a perfectionist  (which I am not) and want NO frosting lines, just keep smoothing.

IMPORTANT NOTE: Only use the spritz technique on white frosting. If you use it on colored frosting, it will run and make your frosting look uneven....especially blue or green.

5. You can go crazy and buy all sorts of decorating tips and doo-dads, but you certainly don't need them.  Get just get a few of the basics and you will be amazed at what you can do.

You will need:
Disposable plastic frosting bags (a true MUST)
2-3 couplers (2 piece couplers let you change tips)
Decorating tips  (a large star and a round writing tip)
Off-set spatula  (not an absolute must, but very handy)
Food color paste (not the watery stuff) Check Walmart
Water bottle for misting


After you "flat frost" the whole cake, it is time to put on the borders/trim and any writing or drawing  you want on the cake. Now is the time you will use the frosting bags and metal tips.


6. The disposable frosting bags are probably the handiest part of this process. You can use non-disposable ones, but once you try to wash one, you will quickly see the "beauty" in the disposable kind.

7. The couplers, are not absolutely necessary either. You can just slide the metal decorator tips down inside the frosting bag and snip off the end. However, if you want to use a variety of decorating tips, the coupler is the way to go. Each one has two pieces; the larger part slides down inside the frosting bag and then the metal tip fits onto it from the outside, then the coupler band is screwed on (does that make sense?)


Once you have the decorating tip on, nestle the decorator bag inside of a large mug or measuring cup and fold the top raw edge down over the container, sort of like folding down a collar. Now put a cup or two of frosting in the bag (the "container" is just to hold the bag steady while you fill it).

Twist the top of the frosting filled bag closed and apply pressure with your fingers. As the frosting comes out the end, you will have to re-twist it tighter before continuing. When you are done using the frosting bag, just use scissors to cut the bag off just above the coupler, then throw the coupler and tip into the dishwasher!!

The base of your cake should have the larger frosting border than the top edge of your cake. Practice making a shell pattern on some wax paper before you try it on the cake.


8. I like to use a Wilton M1 tip on my cake base; it is a huge star tip and it takes an over sized coupler as well.


NOTE: When you first start to decorate, you will be fairly slow. Keep in mind that the heat of your hands can soften the frosting in the frosting bag and that can be a problem. If you find it getting too soft to hold its shape, put it in the fridge for about 20 minutes.

NOTE: Don't use regular (watery) food coloring in this frosting recipe; not only will it effect the consistency of your frosting, but the colors will  never get any stronger than a pastel color. 

Get some food coloring paste (it is very concentrated and gives you very deep colors, so go easy with it at first); one drop of blue will color an entire bowl of frosting. 

Walmart sells the food color paste in their cake decorating section.

NOTE: A fun thing to try is edible glitter. It is basically a transparent food starch that has been dried and flaked, but you can sprinkle it on ANY color frosting and it will look shiny and sparkly; it is GREAT for cupcakes or little girl princess cakes.

Another fun decorating tip is called a grass tip.

Grass Tip
 
Using a grass tip is super easy, you just apply lots of pressure, then immediately release the pressure and lift up at the same time which will make "blades" of grass.
 
 
GIVE IT A TRY !! BUT MOST OF ALL ...


HAVE FUN !!!